
Step 1: Creating your Metamask Wallet
Metamask is a crypto wallet, in the form of a browser extension, which will enable you to store both cryptocurrency and NFTs.
Metamask is compatible with the Chrome browser and the Brave browser. You need a crypto wallet in order to take possession and store your NFT token. Metamask is the most popular and widely supported browser based wallet currently available.
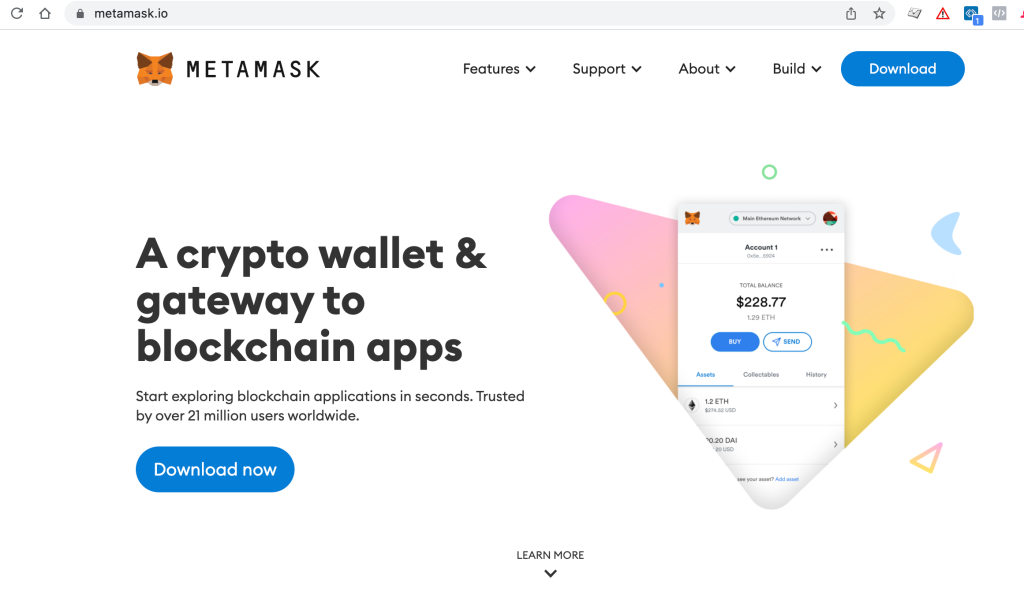
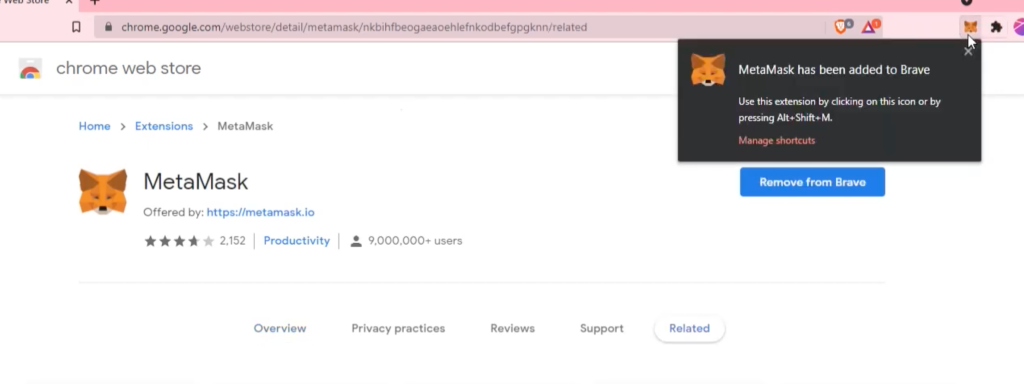
+ Pick the browser you prefer and then use it to visit Metamask.io and click Download.
Metamask is compatible with the following browsers only: Chrome, Brave, Firefox and Edge.
+ Once the extension is installed, look for the fox icon at the top right of your browser and click it to launch Metamask.
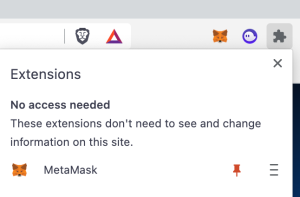
Pro Tip: Click the puzzle piece icon to open a dropdown where you can “pin” the Metamask fox to persistently display on your toolbar.
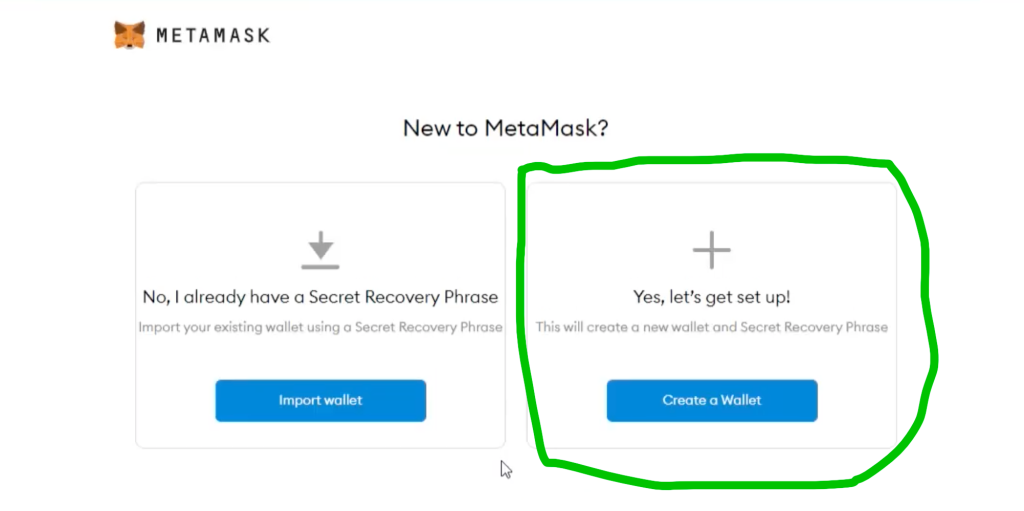
+ Choose the new wallet option on the right.
+ Proceed past the privacy page.
+ Create Password: pick something you will remember. You will need this whenever you launch and access your Metamask wallet.
+ Secret Backup Phrase – !!IMPORTANT!! Be sure to write this down and put it in a safe place. If you lose this, it is like losing cash. You can’t retrieve it and there is no customer support you can call. You won’t need this phrase on a regular basis (only the password you assigned) as you interact with your wallet. But when you get a new computer, or your computer crashes, or is lost or stolen, etc… you will need to set up a new wallet and you will use this backup phrase to restore your wallet and all of the NFTs and cryptocurrency associated with it.
+ Proceed through the backup phrase screen to the Congratulations screen.
Boom! You now have a crypto wallet. Onward to step 2!
Step 2: Add the Polygon Network to your Wallet
Metamask includes the Ethereum blockchain network by default. You will need to add another network, widely used for NFTs, called Polygon (also known as MATIC) to your wallet. Don’t worry. The procedure is mostly painless! 🙂
+ Switch the connected blockchain by clicking on the tab saying Main Ethereum Network.
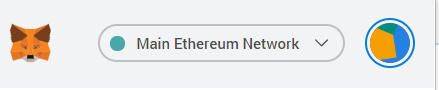
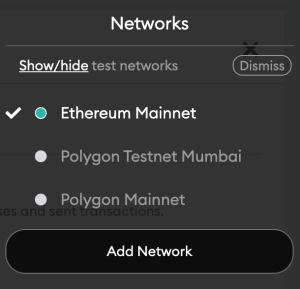
+ From the dropdown, click on “Add Network” or “Custom RPC”.

+ Copy and paste in the Polygon Mainnet settings as follows:
Network Name
Polygon Mainnet
New RPC URL
https://rpc-mainnet.maticvigil.com/
Chain ID
137
Currency Symbol
MATIC
Block Explorer URL
https://explorer.matic.network/
+ Click Save.
Done! You have now connected to the Polygon / Matic mainnet with your Metamask Wallet! Let’s bring this NFT ship to port with step 3!
Step 3: Receiving your NFT and viewing it on OpenSea
You’re nearly done! 🙌 Metamask Wallet stores your NFTs; however, you can’t view them directly from your wallet. In order to see the NFTs in your wallet we will be using OpenSea. OpenSea is a popular NFT marketplace where you can view, trade and sell your NFTs.
+ Now that you have your wallet set up, you will need to send NiftyBaby your public address so we can send you your NFT! This address is safe to share. It gives no one access to your private keys, which remain safe behind your wallet passphrase. Your public address is like an email address or phone number – it is meant to be shared. Anyone with your public address can send you NFTs or cryptocurrency tokens, but they have no access to your wallet or the tokens held within it.
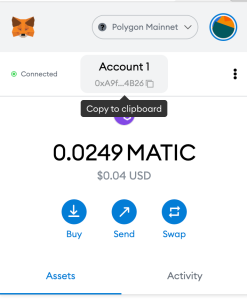
You’ll see your address under the account name. Clicking on it will copy it to your clipboard. Paste it and you will see a 42 digit string similar to this:
0xA9f283D0f882d289272C73F3290B017309914B26
+ You’ll need to paste that into the “Polygon Wallet Address” field on the “Token Redemption Form” below, along with the same info you used when you made your purchase. We will send the token to the address you specified within 2 business days and we will email you confirmation. If you have any questions please don’t hesitate to reach out to us at support@niftybaby.io.
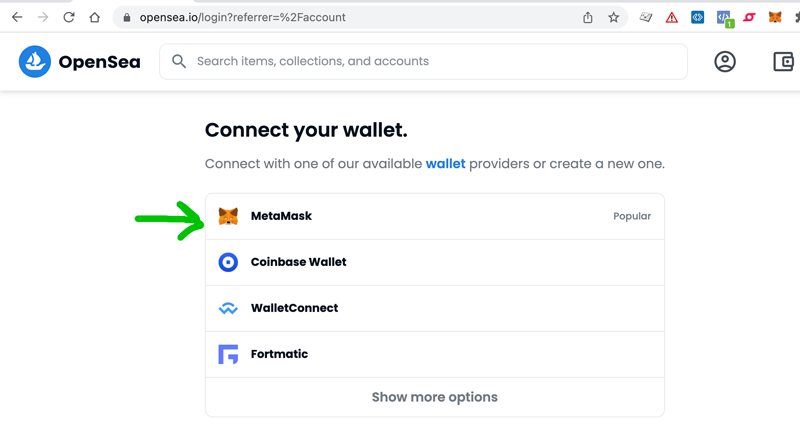
+ Once the NFT is sent to you it will be in your Metamask Wallet. But you can’t view it directly from there. Instead you will visit opensea.io with the browser your Metamask is installed on. Click on the profile icon.
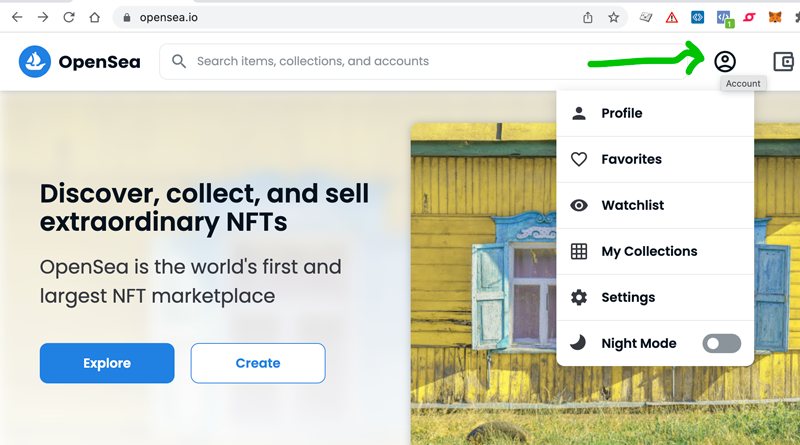
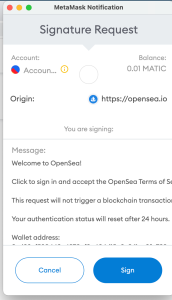
+ This will take you to a page where you will choose to connect your Metamask Wallet. You will be prompted to “Sign” for permission. This is just giving the OpenSea site permission to display the NFTs within your wallet so you can interact with them.
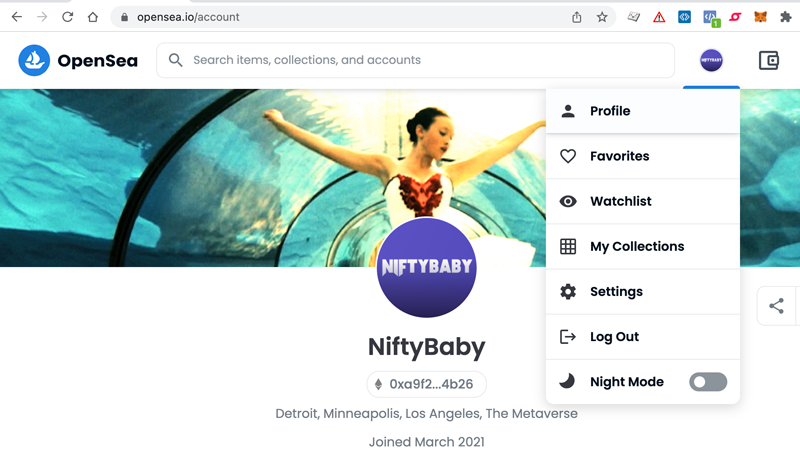
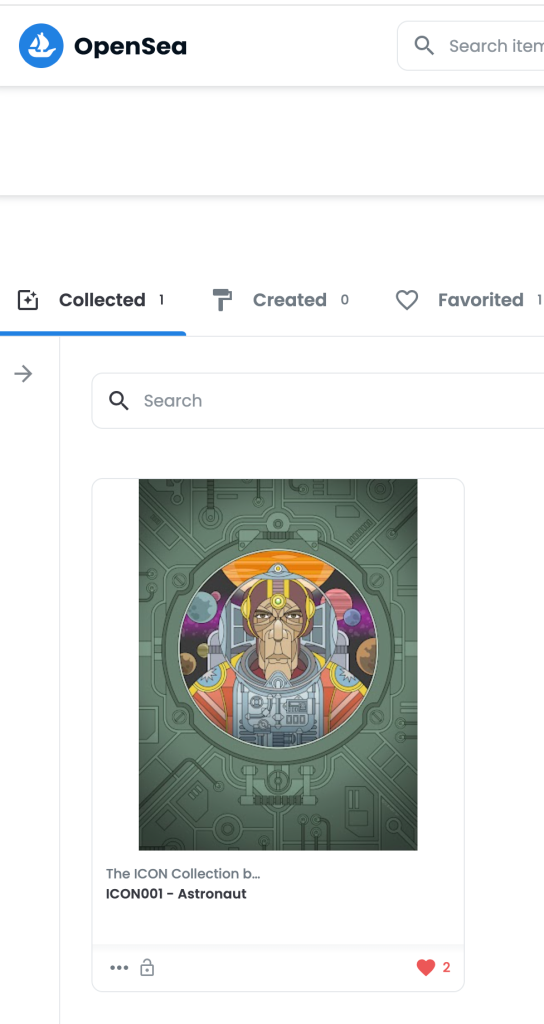
+ OpenSea will automatically create an account for you on their site, connected to your wallet. You can change the name or customize your profile picture if you feel like it. Next, click on the profile icon from the account dropdown menu. This will take you to the page displaying the NFTs in your wallet.
Congratulations, hotshot! You’re done!
If you have any questions or feedback about our tutorial please let us know at support@niftybaby.io.